Master The Netgear ReadyNAS: Login, Setup, Configuration & Troubleshooting
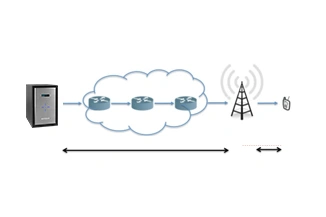
The Netgear ReadyNAS (Network Attached Storage) is a cloud storage that allows users to store data, whether it is documents, files, videos, or else. Whether you are at home or want to access all the data remotely, the Netgear ReadyNAS is a stop solution. This acts as the central command center of the data. Additionally, rather than cloud-enabled storage, the Netgear NAS ReadyNAS provides flexibility, security, and high-speed performance.
Here, you will go through the complete Netgear ReadyNAS setup, and after finishing, you will get control over the cloud storage. Also, the Netgear ReadyNAS provides authentic multiple-user access to the cloud storage. Importantly, the data protection is an A+ grade; no one can access the data without your permission. Also, you will learn about the management of the Netgear ReadyNAS login, password resets, and configuration, which ensures a smooth and hassle-free experience with the cloud storage.
What Is Netgear ReadyNAS?
The Netgear ReadyNAS is a professional network-attached storage specially designed for those who prefer secure cloud backup for their data. This offers RAID (Redundant Array of Independent Disks), which is known for its performance and data redundancy. Additionally, cloud integration and highly secure storage for storing personal data.
Key Takeaways:
Centralized Storage
You can access the data from multiple devices with valid login credentials on the same network.
Advanced Backup Options
The Netagear ReadyNAS offers automatic backup to the cloud for stored data. You can even back up the stored data from another NAS unit.
Secure Access
Multiple users can access the cloud data by using the same network and login credentials.
High-Speed Networking
It can store a gigabit of data and transmit data with the 10GbE, which means it can transmit 10 gigabytes per second.
The Netgear ReadyNAS setup is the best option for those who are seeking reliable and flexible, and manageable cloud storage.
Prerequisites for Netgear ReadyNAS Setup
It is compulsory to know which accessories are required to perform the Netgear ReadyNAS setup for seamless access to the cloud storage. Here in this section, all the prerequisites are mentioned below. Consider gathering these before starting the Netgear ReadyNAS setup:
- Netgear ReadyNAS.
- Stable and active internet connection.
- Ethernet cable and power adapters
- Compatible device (Laptop, computer, or smartphone)
- Default login details, i.e, username and password, to access the administrator dashboard.
- Correct the Web address to access the login page.
Gathering and checking all the accessories before the setup ensures a smooth initial setup.
How to Perform Netgear ReadyNAS Login
Logging into the Netgear ReadyNAS admin panel is the first and most important step to managing the NAS efficiently. Once you get into the administrator dashboard, you can configure the storage. Additionally, you can manage connected users, backups, and network settings. Here are the detailed steps to perform the Netgear ReadyNAS setup:
- First and foremost, insert the storage disks if you have and want to integrate and access them through the Netgear ReadyNAS cloud storage.
- Next, choose the perfect position for the ReadyNAS and connect it to the power outlet.
- Then, connect the Netgear ReadyNAS with your router by using the Ethernet cable.
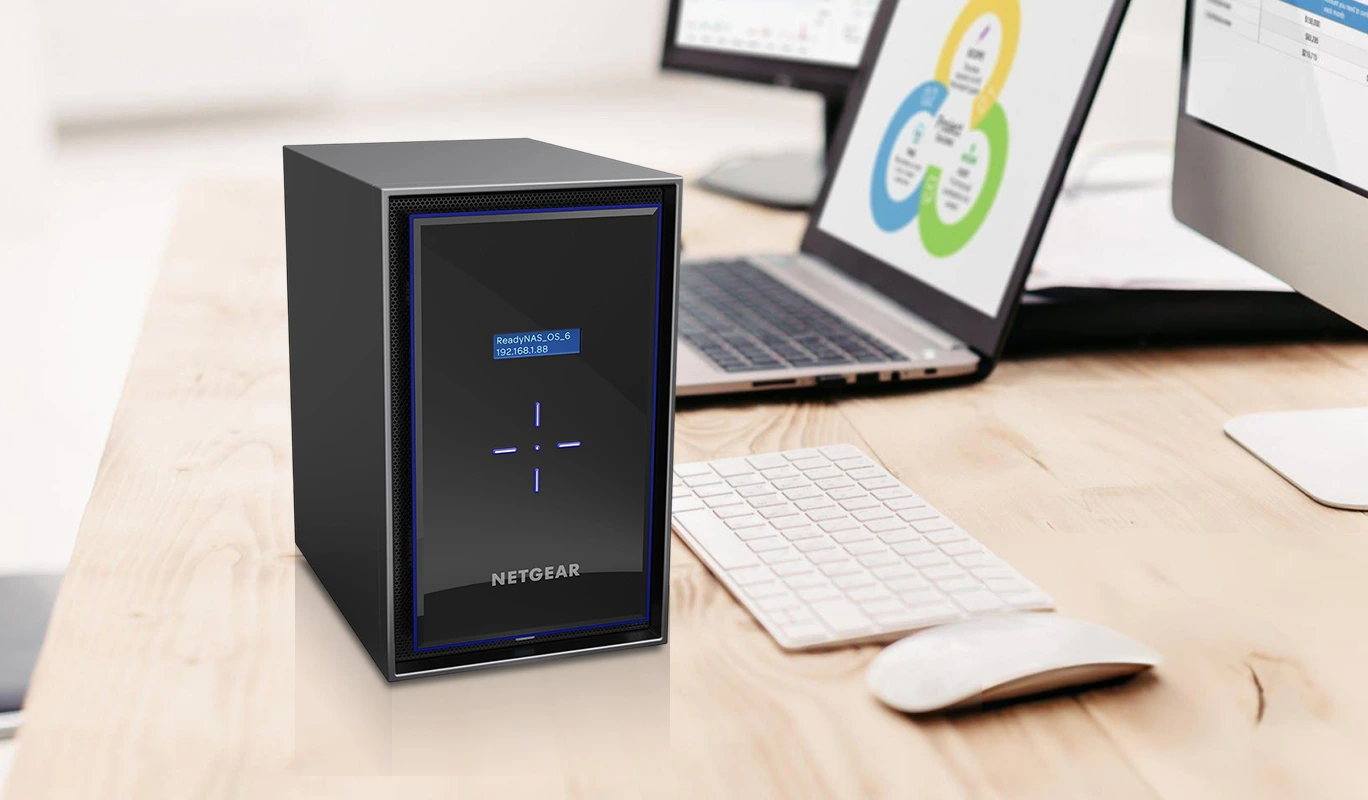
- Now, check the LED status of the Netgear ReadyNAS, and once it turns solid, it indicates that the ReadyNAS is ready for the setup process.
- Hereon, connect your device to the router with which the Netgear ReadyNAS is connected.
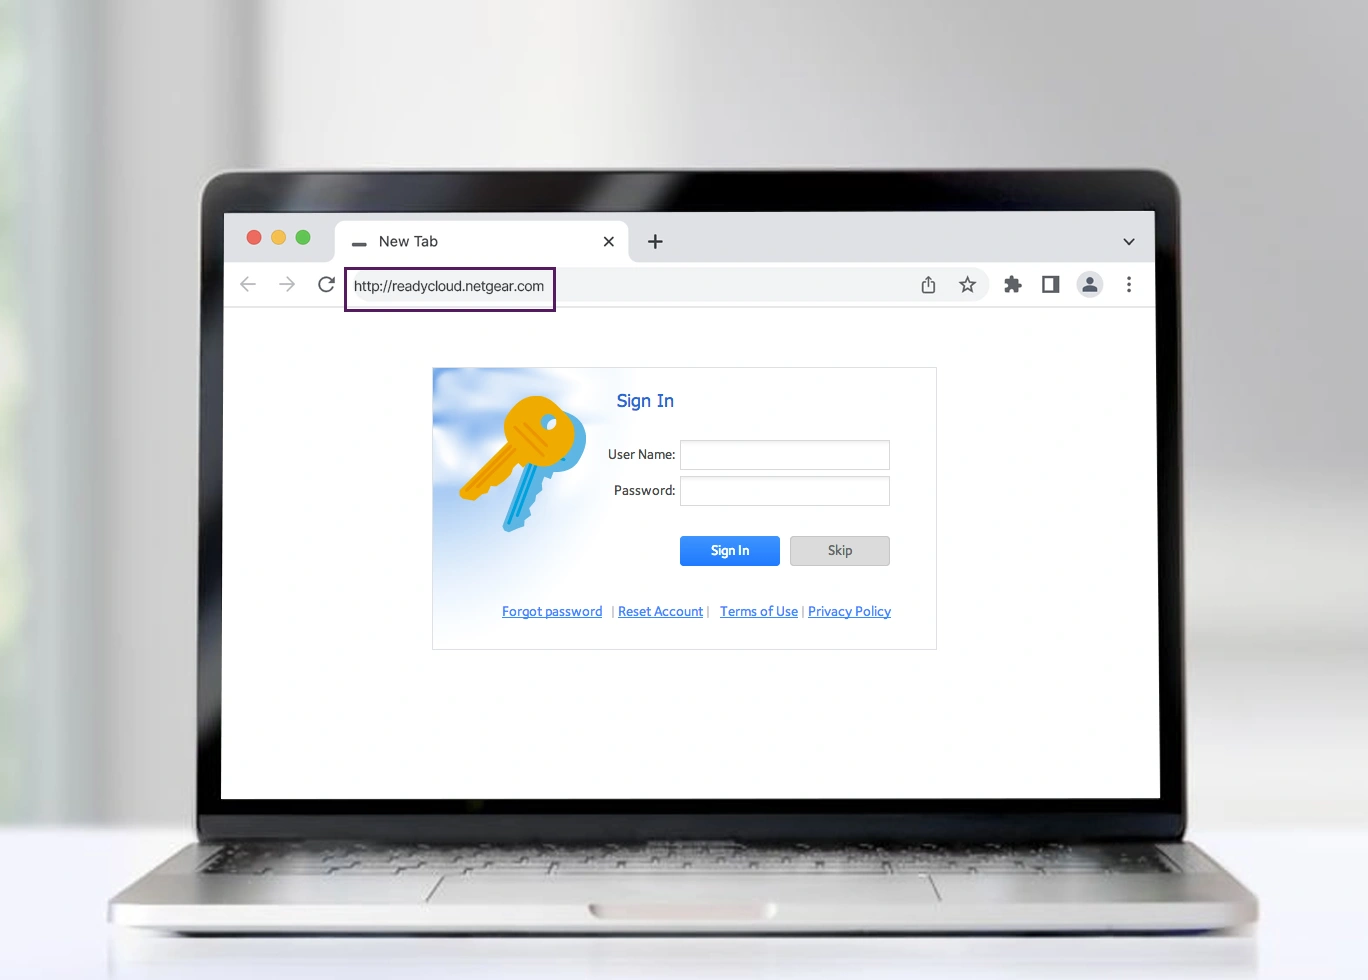
- Afterwards, open the web browser and navigate to http://readycloud.netgear.com on that connected device.
- However, you can also use the Netgear ReadyNAS IP address. Also, by using the Netgear ReadyNAS software, if the login web address is not reachable in any case.
- Finally, enter the default password for Netgear ReadyNAS to access the admin panel of the NAS.
If the Netgear ReadyNAS default IP isn’t working, use Netgear ReadyNAS software to complete the setup process. By chance, you are unable to recall the login details, and you are an existing user, then reset the Netgear ReadyNAS.
Netgear ReadyNAS Setup - Quick and Easy Steps
After navigating to http://readycloud.netgear.com, click on Start, which is under the Setup new ReadyNAS.
Now, click on the Discover button and click on the Setup button.
From here, there are two modes for setting up the Netgear ReadyNAS:
ReadyCLOUD Mode
Offline Mode
Netgear ReadyNAS Setup Via ReadyCLOUD Mode
- Once you click on the setup button, a prompt will appear to choose the mode. Firstly, let's discuss the ReadyCLOUD Mode.
- When you choose the ReadyCLOUD Mode, sign in to the ReadyCLOUD by using your My Netgear account credentials. In case you don’t have a My Netgear account, then create the account first.
- Then, after signing in, the ReadyCLOUD automatically detects the new Netgear ReadyNAS on the network.
- Choose the correct Netgear ReadyNAS in ReadyCLOUD Mode and follow the on-screen instructions.
- Lastly, after the successful configuration, click on Save and Apply Changes. With this, you're done with the Netgear ReadyNAS Setup Via ReadyCLOUD Mode.
Netgear ReadyNAS Setup Via Offline Mode
- After navigating to http://readycloud.netgear.com to access the admin panel of the storage system.
- Click on the Sign In and enter the correct email address and password to log in.
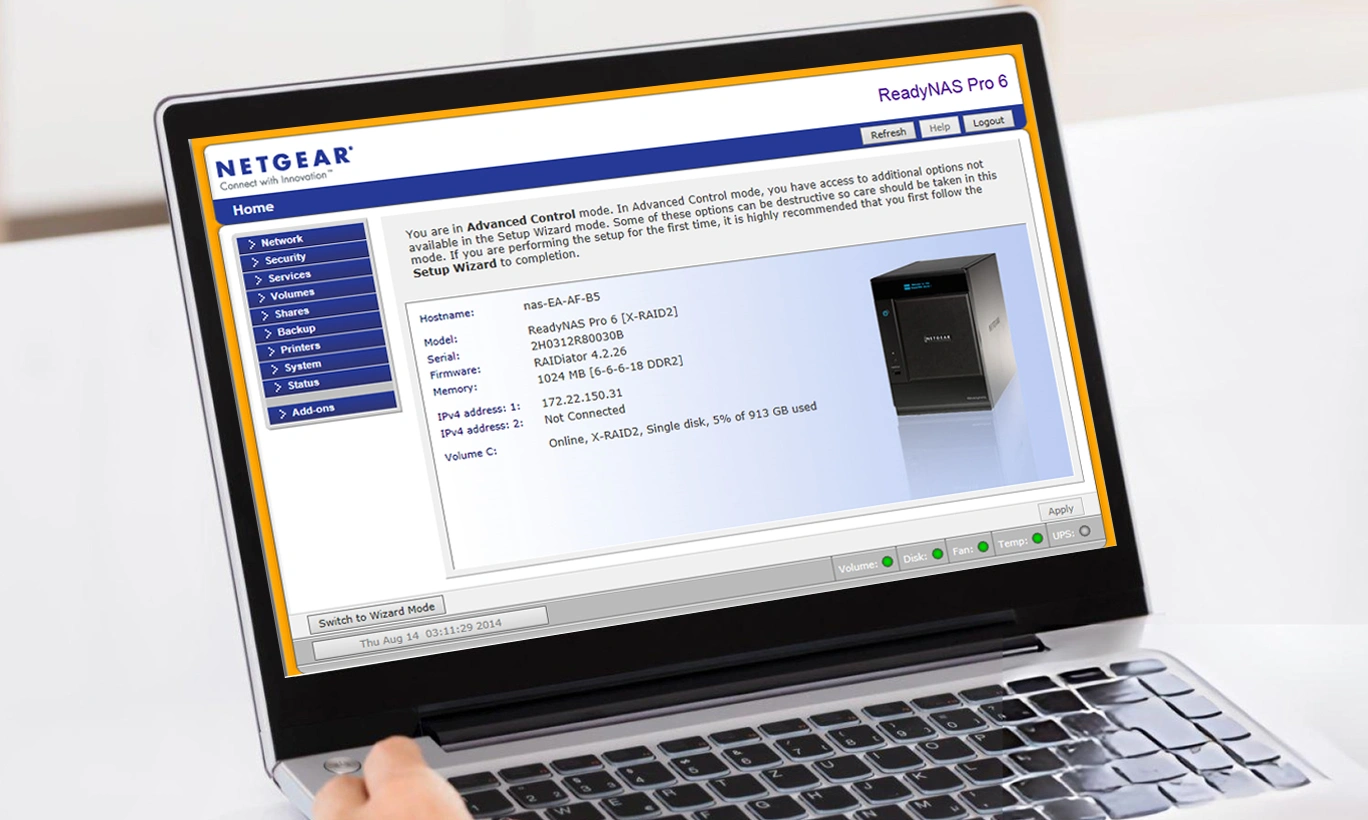
- Afterwards, the ReadyNAS local admin page displays in your browser, and you can configure the ReadyNAS.
These are two types of modes through which you can access the administrator dashboard of the Netagear ReadyNAS.
Netgear ReadyNAS Configuration
Once you log in, now, the administrator panel allows you to perform the Netgear ReadyNAS configuration to optimize the storage, performance, and security. Here is the configuration you can do after accessing the dashboard of the Netgear ReadyNAS:
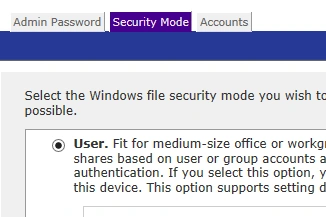
- User Management: Create accounts and set permissions for each user.
- RAID Setup: Configure RAID levels for redundancy and speed.
- Network Settings: Assign static IP, DNS, or custom network configurations.
- Shares and Folders: Create shared folders for easy access by devices on your network.
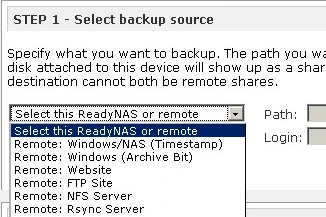
- Backup Jobs: Schedule automated backup to other NAS units or cloud storage.
Note: Always keep the Netgear ReadyNAS firmware up to date for smooth accessibility, security, and stability.
How to Reset Netgear ReadyNAS Password
Sometimes, a user may forget the admin login credentials. If you forgot – no worries, you are not alone. This is a common issue, and knowing how to perform a Netgear ReadyNAS reset password is compulsory:
- Firstly, make sure that the Netgear ReadyNAS is powered ON.
- Then, connect your device to the home wifi network, and the ReadyNAS must be connected to that network.
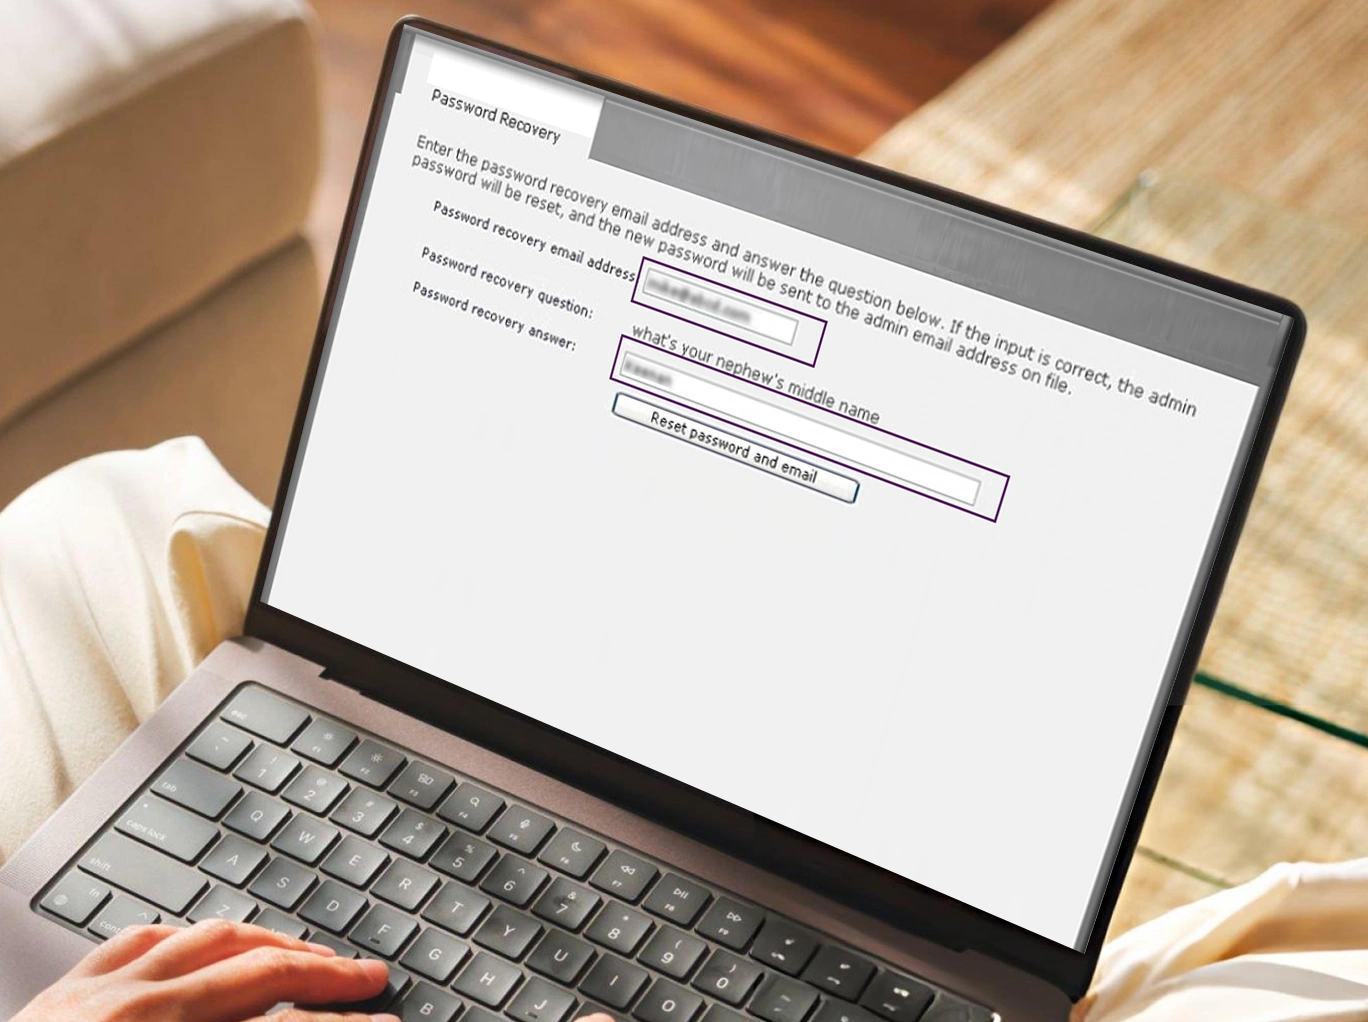
- Now, launch the browser and navigate to https://ReadyNAS_IP_address/password_recovery.
- Onwards, the password recovery window will appear.
- Then, click the reset button within 5 minutes. Now, locate the reset button on the Netgear ReadyNAS and press it.
- When you press it, the password reset confirmation prompt will appear on the browser screen.
- Hereon, you can reconfigure the Netgear ReadyNAS with the default login password.
With this, you have mastered “How to Reset Netgear ReadyNAS Password”. Now, you can reset it at your end.
How to Reset Netgear ReadyNAS Network Settings
If you are attempting to access the NAS, and network issues are preventing you from accessing it. In that case, use Netgear ReadyNAS reset network settings to restore connectivity:
- In the beginning, log in to the Netgear ReadyNAS admin dashboard.
- Onwards, head to the Network Settings and then click on Restore the Defaults
- Next, confirm the reset and, with this NAS, revert to the DHCP network settings.
- Now, access the NAS by using the Netgear ReadyNAS IP address.
This method fixes if your Netgear ReadyNAS not working due to misconfiguration of the network.
Common Issues and Troubleshooting
During the setup of the Netgear ReadyNAS, common errors can occur and interrupt access to the storage. Here are the common errors with the fixes:
Cannot Log In
- Firstly, ensure that the ReadyNAS is powered ON properly.
- Also, check the condition and connection of the wiring. If you detect any faulty cable, replace it with a new ones.
- Importantly, make sure that you are entering the correct Netgear ReadyNAS login credentials.
- Additionally, cross-check the Netgear ReadyNAS IP address/web address.
- You can get into the admin panel by using the ReadyNAS Discovery Software.
Password Recovery Not Working
- If you are unable to recall the admin login password. Then, it is recommended to perform a Netgear ReadyNAS password reset / Netgear ReadyNAS factory reset if recovery fails.
Network Issues
- Firstly, use Netgear ReadyNAS reset network settings to restore connectivity.
- Also, consider assigning the static IP if the DHCP fails.
- Lastly, you can power cycle the Netgear ReadyNAS and Netgear router. This will refresh the network and automatically fix the temporary bugs in the network.
Device Not Responding
- If the Netgear ReadyNAS is not responding, reconnect all the cables and power it ON.
- Also, ensure that you have upgraded the firmware file.
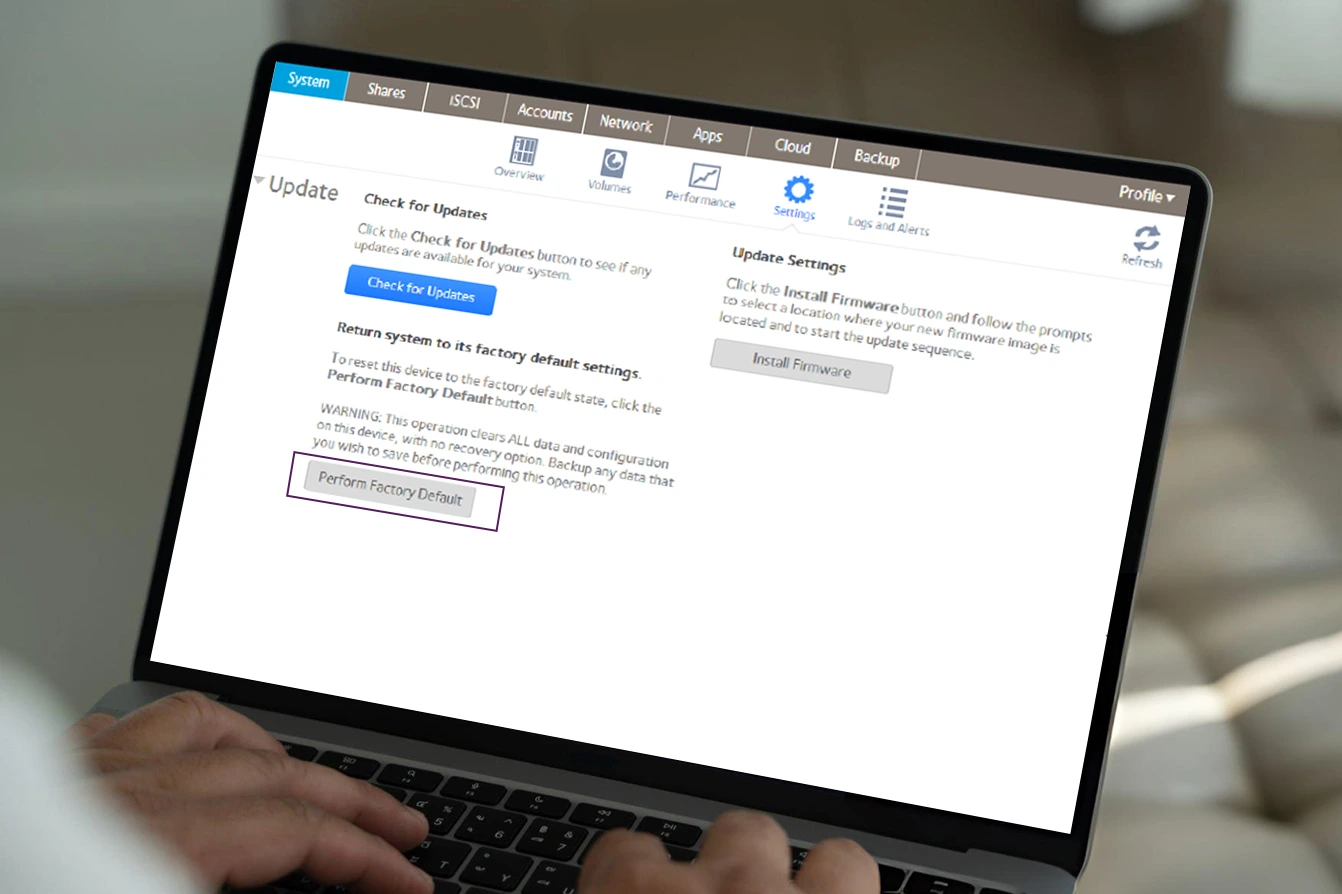
- If you have followed all the above methods, then lastly, proceed with the Netgear ReadyNAS factory reset.
These are some common errors that can occur during the Netgear ReadyNAS setup, with fixes. You must follow all the troubleshooting tips step by step.
Best Practices for Netgear ReadyNAS
To avoid security vulnerabilities, here are the best practices for Netgear ReadyNAS setup:
- Importantly, make sure that you update the firmware frequently.
- Also, note down and save the admin credentials for future use.
- Use RAID configurations that match your storage and redundancy needs.
- Enable snapshots and backups for data recovery.
- Use ReadyNAS software for periodic health checks.
The Netgear ReadyNAS is a versatile and secure NAS solution for both personal and business storage needs. Following this Netgear ReadyNAS setup guide, including login, configuration, password recovery, network resets, and troubleshooting, ensures smooth operation and optimal performance.
FAQs About Netgear ReadyNAS
What is the default password for Netgear ReadyNAS?
Typically, the default password for Netgear ReadyNAS is “admin” or blank, depending on the model.
How do I find my Netgear ReadyNAS default password?
To find the Netgear ReadyNAS default password, look over the label of the NAS.
How do I reset Netgear ReadyNAS password?
Use the soft reset for admin password reset or a factory reset if needed.
How to fix Netgear ReadyNAS not working?
Power cycle, check cables, reset network settings, or perform a factory reset.
Can I recover files after a factory reset?
Yes, if the data drive is intact. Factory reset only restores settings, not stored data.