Netgear Nighthawk Router: Quick Login & Setup
In the current digital landscape, upgrading to the Netgear Nighthawk gaming router is the best way to boost your home networking and reliability. The Nighthawk gaming routers are efficient enough and have advanced capabilities, offering blazing-fast wifi network and robust performance. The Netgear Nighthawk Setup is easy and can usually be facilitated within a few minutes and using the useful Nighthawk app.
Nonetheless, there are times when you may come across frustrating problems, which can leave you stuck. Therefore, this guide is here to assist you with Netgear Nighthawk Setup Not Working. Additionally, we will walk through the error, catching you on the edge and having a blazingly quick and reliable internet connection.
Quick Checklist For the Netgear Nighthawk Setup
Before heading directly to the Netgear Nighthawk Router Setup, you must be ready with the essential things, as mentioned below:
- A Netgear Nighthawk App
- Reliable Network
- Accurate WiFi Network name and password
- Default Login credentials
- An updated Nighthawk App
- Compatible Smartphone and Computer
- Ethernet Cables, etc.
After collecting these things, you must also take care of certain things when heading towards the Netgear Nighthawk Setup. Here are those key considerations:
- Most importantly, install antennas and align them properly.
- Then, turn off the modem and disconnect the battery where appropriate.
- Additionally, plug the Ethernet cable from the router to the Internet port of your modem.
- After that, ensure your router and modem have a sufficient power supply.
- Then, turn on the power to the modem and wait until it gets a stable connection.
- Turn on the router and wait till the power light stabilizes.
- Moreover, configure Nighthawk's WiFi into every device by providing the SSID and password on the router.
- You must know the accurate www.routerlogin.net or routerlogin.net to get into the Nighthawk router interface.
- Additionally, you must know the default login credentials.
- Moreover, keep your devices handy and up to date with the latest software version.
How to Install and Set Up the Netgear Nighthawk Router?
The installation of the Netgear Nighthawk router is an easy procedure that will guide you to connect to the Internet quickly and safely. This section will walk you through the process of installing the hardware, connecting to your modem, using the Netgear Setup Wizard, and tweaking your network settings to achieve the best performance.
Moreover, connect to the internet quickly with either the Nighthawk app or the web interface. Additionally, you can use your Netgear Nighthawk router to its fullest capability by enjoying high-speed networking and tailoring your network to your unique home or office needs. Now, let us walk through the quick steps to set up the Nighthawk router:
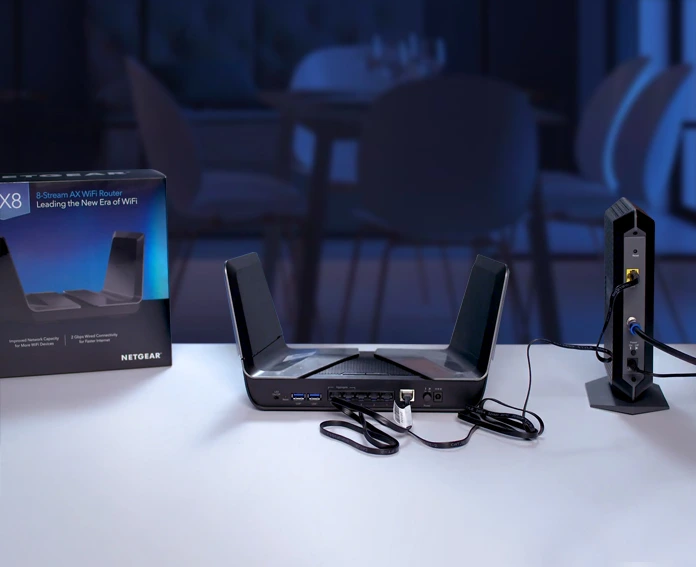
Physical Installation
- First, turn off your modem by unplugging it from the power source. Wait at least a minute to be sure it is powered off.
- Next, use an Ethernet cable that comes with your Nighthawk router.
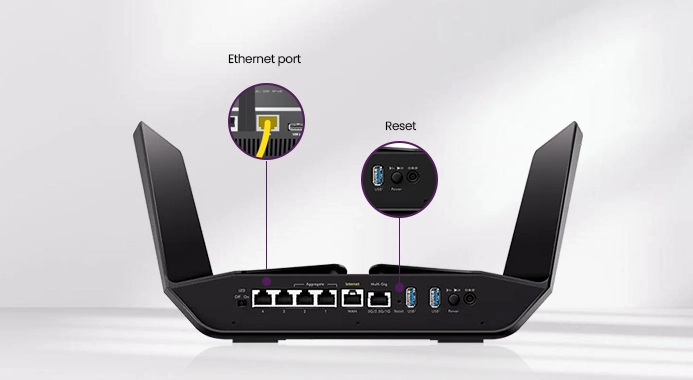
- Further, plug one end into the yellow Internet port on the back of the router, and plug the other end into an available Ethernet port on your modem.
- Then, plug your modem back into the outlet and wait until its lights turn stable.
- Next, connect your Nighthawk router to the power outlet and push the power button on the back.
- Wait until the power light on the router turns a solid white.
- Till here, the physical Nighthawk setup and installation are finished.
Now that you have installed the Netgear Nighthawk gaming router. Further, you must learn how to set up your router. Usually, you can set up the Nighthawk router via the Nighthawk app or perform the Netgear Nighthawk Setup PC. The app-based method is more convenient and easier to follow. Here are the quick steps for the app setup:
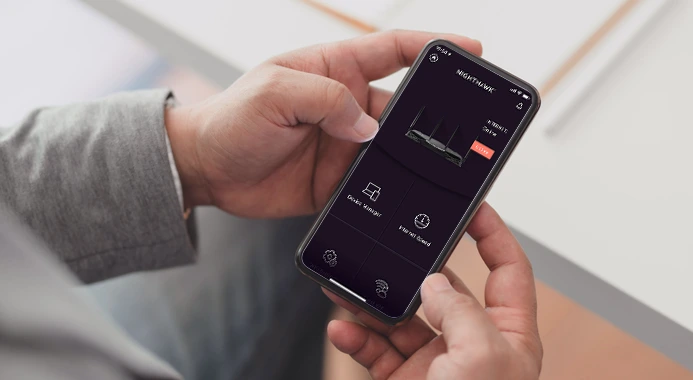
Nighthawk App Setup
- Once the physical setup is completed, download the latest version of the Nighthawk app on your phone.
- After that, ensure your device is connected to the 2.4 GHz wifi network.
- Then, open the Nighthawk app on your mobile and create an account.
- If you have the existing credentials, use them to log in to your account.
- Your new router will automatically be detected by the app.
- Next, visit the Settings> Wi-Fi Settings, and connect your device to the default wifi network.
- After that, follow the app instructions to complete the Netgear Nighthawk Setup.
How to Perform the Netgear Nighthawk WiFi Setup?
After completing the initial Netgear Nighthawk Setup, you must learn the Netgear Nighthawk WiFi Setup Instructions. The process of setting up your Netgear Nighthawk WiFi guide is a very simple and easy-to-follow process that aims to help you get your network up and running.
With an easy-to-use Nighthawk app, you can configure your hardware, set up WiFi preferences so you can get the best, quickest, most reliable WiFi connection in every corner of your premises. If you want to set up wifi on your gaming router, go through this Netgear Nighthawk WiFi Setup Guide:
- Initially, open the Nighthawk app on your smartphone.
- Then, connect your modem and turn the modem off temporarily.
- After that, connect the modem to the router with an Ethernet cable to the Internet port of the router.
- Now, turn on the modem and leave it to stabilize.
- Next, connect and turn the Nighthawk router on.
- Further, connect your phone or computer to the router using the default WiFi SSID and password.
- Open the app and follow the step-by-step procedure to scan the QR code on the router to detect the network.
- Go to the Netgear Nighthawk WiFi Settings and change your SSID and WiFi password.
- Hereon, create a new admin password and security questions to recover router logins.
- If prompted, upgrade the firmware, and reconnect accessories to the new WiFi.
Thus, the Netgear Nighthawk WiFi Setup process of setting up your Nighthawk router fully in an optimal, fast, and secure WiFi connection.
How Can I Perform the Netgear Nighthawk Setup Without App?
Moreover, you can also perform the Netgear Nighthawk router setup without the Nighthawk app. Indeed, the web-based interface of the Netgear router enables users to complete the router setup seamlessly. Additionally, it gives you full control over your router settings without even requiring a smartphone. So, here are the quick steps to Netgear Nighthawk Setup Without App:
- In the beginning, take your Netgear Nighthawk out of the box and plug in the antennas.
- Then, turn off your modem and, where it came with battery backup, unplug it.
- Further, plug an Ethernet cable that runs between your router and your modem into the yellow port on the web router, labeled Internet.
- Now, connect your modem to the switch and power it back onto the modem, and wait until the modem restarts fully.
- After that, connect the power to your Nighthawk router until the power control light turns solid white.
- Next, connect your device to the router's default WiFi network using the SSID and password found on the router label.
- Now, the NETGEAR setup page opens automatically.
- Hereon, go to www.routerlogin.net or routerlogin.com.
- If these web addresses don’t work, you can also use the default Netgear Router Setup IP.
- Then, log in with the default name and enter the Netgear setup wizard.
- To configure the WiFi name (SSID) and password, follow the setup wizard.
- Lastly, save your settings and reconnect all your devices using the new credentials of WiFi credentials.
- With this, the Netgear Nighthawk WiFi Setup without app is completed.
Quick Steps to Netgear Nighthawk Setup VPN
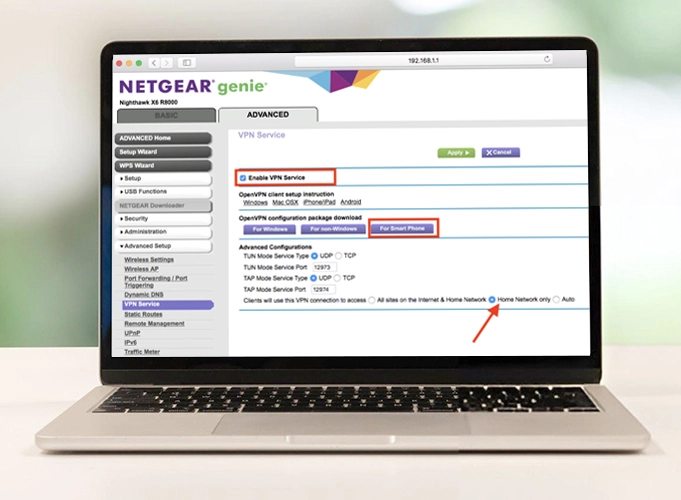
To start the Netgear Nighthawk Setup VPN process, enable your router to act as a VPN server to securely encrypt a tunnel to your home network. This functionality is performed by initially enabling the service over the web interface of the router, which will, in turn, generate a configuration file. Then you use the file to remotely access your network with any device. The step-by-step process for setting up the VPN services on your device is given below:
- Initially, launch a web browser on your Wi-Fi-enabled laptop or computer.
- Next, navigate to routerlogin.net or routerlogin.com.
- Further, log in to your Netgear Nighthawk gaming router.
- After that, you will enter the Basic Home Page of the Nighthawk router.
- Further, go to Advanced>Advanced Setup>VPN Service and here, enable the VPN service.
- Now, allow the VPN clients to use and access your network.
- Finally, tap “Apply” and implement these changes.
- Then, download the configuration files on your device for the VPN clients.
- Next, unzip this file and install the VPN client.
- Now, the Netgear Nighthawk Setup VPN is finished.
Is Your Netgear Nighthawk Setup Not Working? Here is What to Do.
Does your Netgear Nighthawk fail to work? You are not alone, lots of users have typical problems like: “Netgear Nighthawk WiFi Setup Issues,” “Netgear Nighthawk App Not Connecting,” or just Netgear Nighthawk WiFi Setup Not Working. Moreover, users also face some connectivity issues, bugs in the application, outdated firmware, physical connection issues, or IP address conflicts, halting the Netgear Nighthawk Setup process. To deal with such issues, try these expert solutions:
- First and most important, check the physical connections and cables of your router, modem, and wall outlets.
- Make sure you have your device on the Netgear Nighthawk WiFi, and not the cellular data.
- If the Netgear Nighthawk WiFi Setup Not Working, restart the router, modem, and the devices connected to it.
- Usually, a quick power cycle can resolve most of the glitches.
- Further, check that your ISP is active and network outage in your local area.
- Then, attempt to enter into the setup of your router by the default Netgear Router Setup IP (192.168.1.1 or routerlogin.net).
- Additionally, adjust or re-arrange your router and antennas to improve the strength of the WiFi signal.
- If you are frequently facing the Netgear Nighthawk WiFi Setup Issues, cross-verify the router's settings.
- Make sure your router is configured at the recommended 2.4 GHz wifi band.
- If the Netgear Nighthawk App Not Connecting, make sure the Nighthawk app is compatible with your smartphone.
- Moreover, disable nearby interference sources like microwaves or metal objects.
- Double-check the Netgear Nighthawk WiFi Settings and make sure you save all the settings.
- Certainly, use the same login credentials as used in the web login when logging through the Nighthawk app.
- As a last resort, reset the router to factory settings, 7 seconds with the reset button.
Above all, mastering the above-described Netgear Nighthawk Setup is essential to elevate your online gaming and streaming experience. For further queries and details, reach out to us!
FAQs
What do I do if the Netgear Nighthawk app is not connecting to my router?
First, connect your smartphone to the WiFi network of Netgear Nighthawk router and not to mobile data. Switch and turn off cell data (when active). Always make sure that the application is updated to the new version, and switch off any type of VPN, firewall, or security software that may be running on your device to ensure a smooth connection.
How do I update my Netgear Nighthawk router firmware?
To update the Netgear Nighthawk router’s firmware, log into www.routerlogin.net on a compatible web browser. Then, log in to your account. You can also use the Netgear Nighthawk app. Further, navigate to the Administration section and find the firmware update section and follow the further instructions.
How do I troubleshoot poor wireless range or weak WiFi signal with my Nighthawk router?
To troubleshoot poor WiFi or weak wireless range, change the location of your router to a central, elevated position without proximity to walls or metal structures. Further, you must update firmware regularly, pointing antennas, minimising interference with other electronics, and use of less congested WiFi channels.
What are the steps to perform a factory reset on my Netgear Nighthawk router?
You can easily factory reset by pressing the reset button on the rear panel of the router and then holding it down until the lights dim. This will revert to factory settings; you will have to reconfigure WiFi credentials and network preferences after that.